Penguins were this year's birthday treat for The Son.
Hello, Cupcake! provided the inspiration and how-tos.
Though it took The Daughter and me a couple of hours to get them done,
they were well worth the effort.
You will need to gather quite a few items to create them:
donettes, donut holes, starburst, tub of white frosting, marshmallows,
chocolate wafer cookies, mini chocolate chips, and of course, cupcakes.

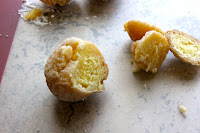
Donettes are the body.
Hello, Cupcake! provided the inspiration and how-tos.
Though it took The Daughter and me a couple of hours to get them done,
they were well worth the effort.
You will need to gather quite a few items to create them:
donettes, donut holes, starburst, tub of white frosting, marshmallows,
chocolate wafer cookies, mini chocolate chips, and of course, cupcakes.

Donettes are the body.
Slice off the tops of the cuppies and the donut holes,
so that they will stack flat.
filler,

and outer part. We tinted using green food coloring,
because we couldn't find black in the stores. I think you'd need to special order it.
Marshmallows create white belly feathers.
Use a gentle sawing motion to cut the cookie/fin.
Quite a few cracked off, all the more to snack on.
Quartered yellow Starbursts became beaks
and mini chocolate chips, the eyes.
The Daughter created her Monsterpenguin.
My personal favorite had the handlebar mustache.
After tiring of penguins, we created a seascape with blue tinted frosting and Swedish Fish.
Penguin Cupcakes
from Hello, Cupcake! by Karen Tack and Alan Richardson
from Hello, Cupcake! by Karen Tack and Alan Richardson
Vanilla cupcakes, with tops leveled flat
Mini doughnuts
2 cans vanilla frosting (or substitute 1 can chocolate if you want black penguins)
Green food coloring or black (if you want black penguins)
Green food coloring or black (if you want black penguins)
Doughnut holes
Marshmallows
Thin chocolate cookies (Famous Chocolate Wafers)
Yellow fruit chews
Mini chocolate chips
Cut the mini doughnuts in half crosswise. Cut 1/8 inch off the doughnut holes, to create a flat surface. Spoon 2 tablespoons of the vanilla frosting into a small ziplock bag, press out the excess air, seal, and set aside. Spread vanilla frosting on the cupcakes and place a mini doughnut half, cut side down, on top. Spread more vanilla frosting on top of the mini doughnut and put doughnut hole on top. Spread more vanilla frosting up the sides of the doughnut holes to fill the gap as smoothly as possible. Place the cupcakes in the freezer for 10 minutes, until slightly frozen.
Tint the frosting green. Microwave in a 2 cup microwavable measuring cup, stirring frequently, until it is the texture of lightly whipped cream, about 35 seconds total. Holding 1 chilled cupcake by its paper bottom, dip it into the tinted frosting just up to the liner. Hold the cupcake above the surface and allow the excess frosting to drip off. Turn right side up and let stand. Repeat with the remaining cupcakes. If the frosting becomes too thick for dipping, reheat for several seconds in the microwave, stirring well.
Using clean scissors, cut 1/8 inch off both flat ends of each marshmallow. Trim 1/4 inch off one side of the marshmallow circles to creat a straight edge. Press 1 cut marshmallow piece onto the frosting on each cupcake, straight edge next to the paper line to make the penguin's belly.
Using a serrated knife, make 2 parallel cuts in each chocolate cookie 1/2 inch in from opposites sides. The 2 curved outside pieces will form the penguin's wings. Trim 1/4 inch from one end of each wing. Press the trimmed end of the cookie into the frosting just below the penguin's head, one on each side, securing them with a dot of frosting.
Cut the yellow fruit chews into quarters to make triangular beaks. For each penguin, place the cut side of one of the triangles onto the frosted doughnut hole, pressing gently to secure. Add the chocolate chips for eyes. Snip a 1/8 inch corner from the bag of the vanilla frosting. Pipe white dots onto the chips.
This post is linked up to I'm Lovin It, I ♥ Naptime, Cast Party Wednesday, It's a Keeper Thursday, Sweet Tooth Friday, Friday Favorites, Foodie Friday, Friday Flair, Sweets for a Saturday, Chic and Crafty,


I'm so making these for my bday in a few weeks, they are fab and I absolutely LOVE them!!!
ReplyDeleteoh, i hope you have lots of fun with them- and happy (early) birthday!
DeleteSo adorable!
ReplyDeleteThey are gorgeous! Thanks for posting the excellent tutorial on how to put these yummy treats together.
ReplyDeleteMy weekly Say G'Day Saturday Linky Party has just started and I would be honoured if you could join in and link up this yummy post!
Best wishes and I hope you have a great weekend.
Natasha in Oz
Those are just adorable. Great job! Love the pictures. Come and visit us. We have some wonderful things to share this week.
ReplyDelete